Mastering Maven: Advanced Techniques and Best Practices
This article delves into advanced techniques and best practices for using Maven, a popular build automation tool for Java projects. Topics covered include module development and design, dependency management, aggregation and inheritance, property management, and multi-environment configuration and deployment. Whether you’re a seasoned Maven user or just getting started, this article will provide valuable insights to streamline your development process and improve your project’s overall quality.
分模块开发与设计
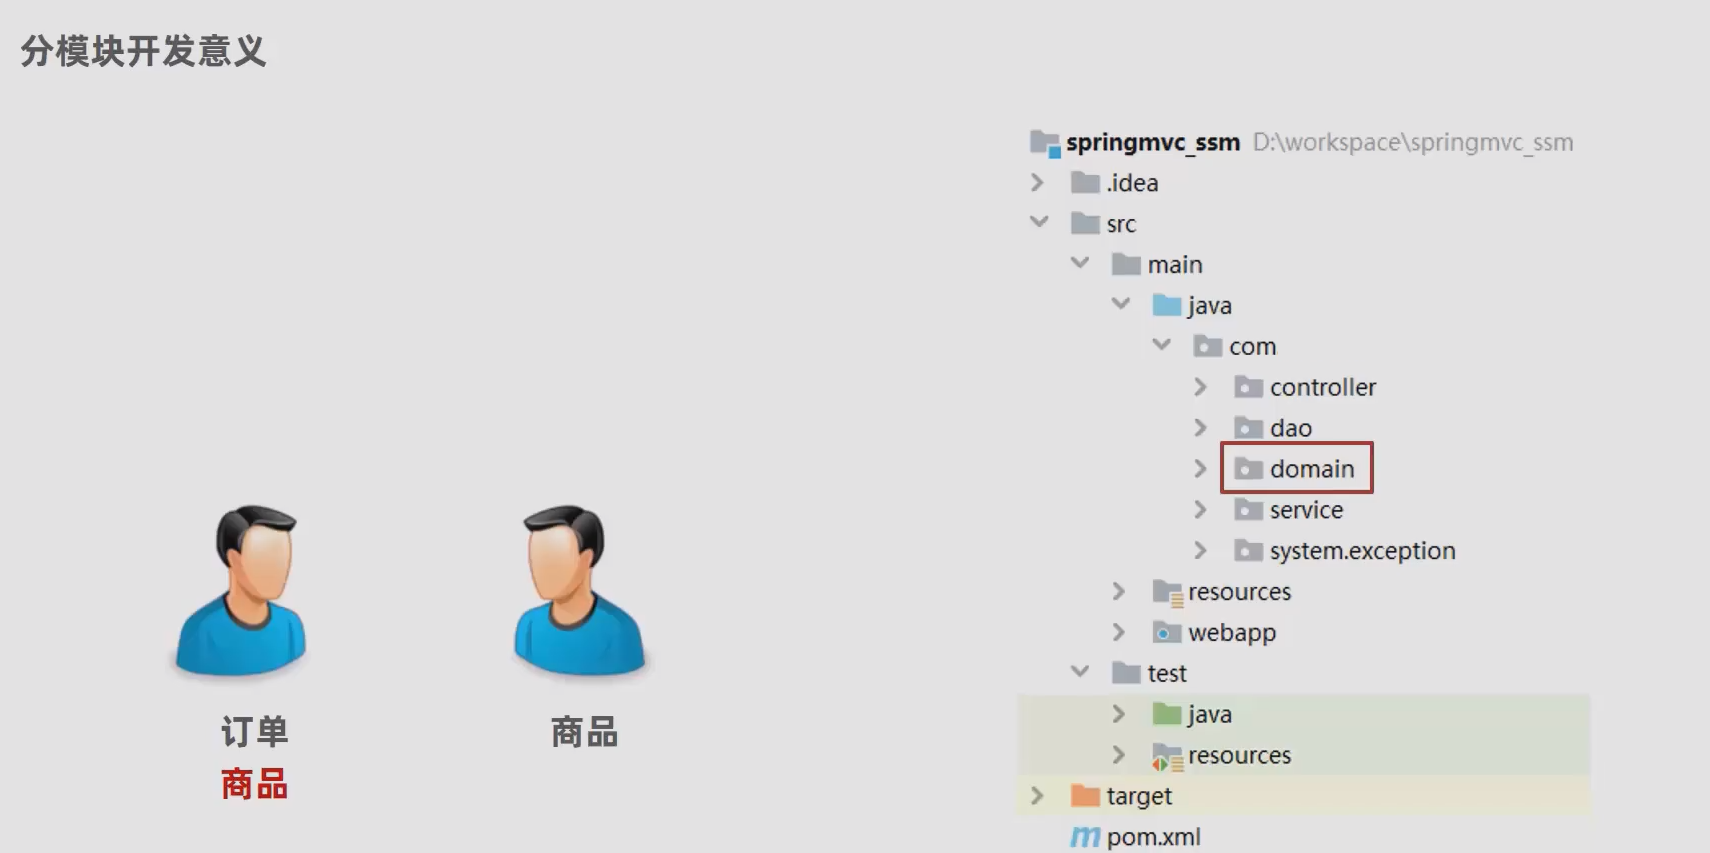
分模块开发意义

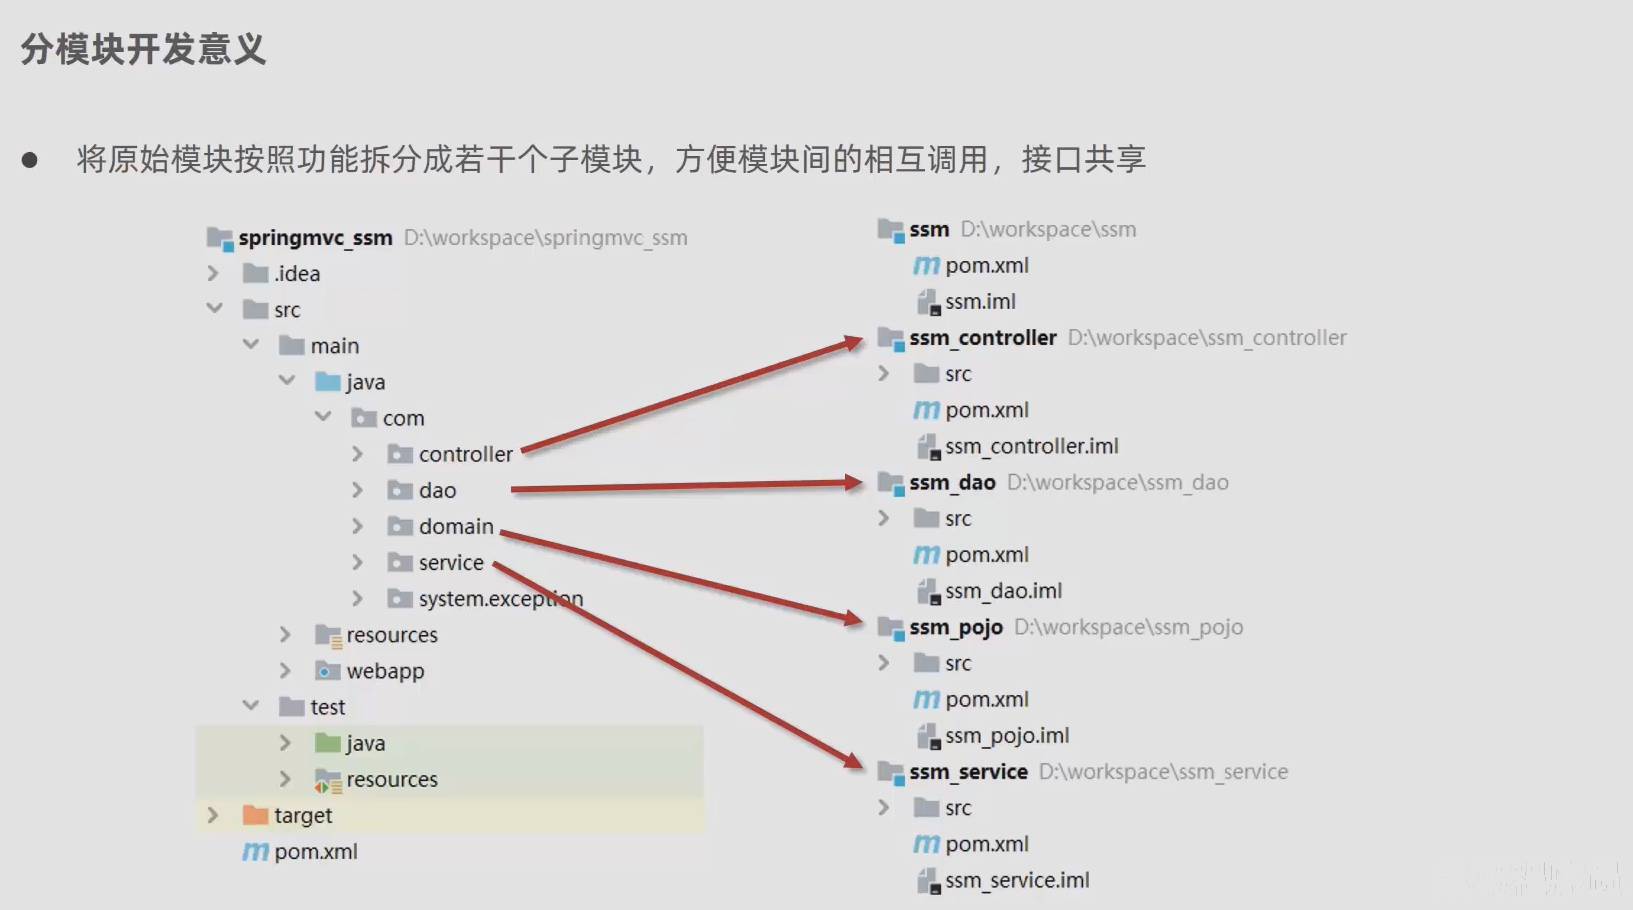
分模块开发与设计
目前 SSM 目录
- 📂src.main.java.com.jerry
- 📂config
- ☕JdbcConfig
- ☕MyBatisConfig
- ☕ServletConfig
- ☕SpringConfig
- ☕SpringMvcConfig
- ☕SpringMvcSupport
- 📂controller
- ☕BookController
- ☕Code
- ☕ProjectExceptionAdvice
- ☕Result
- 📂dao
- 📂impl
- ☕BookDao
- 📂domain
- ☕Book
- 📂exception
- 📂service
- 📂impl
- ☕BookService
- 📂config
分模块需求
业务扩张,domain 需要拆分成新的 Module
(所有的功能都可以拆分成新 Module,这里以 domain 为例)
分模块步骤
创建新的 Pojo Module, 并将 SSM Module 的 domain 文件迁移到新 Pojo Module
- Pojo(Plain Old Java Object): 轻量级的 Java Bean,通常只包含私有属性、getter 和 setter 方法以及无参构造函数
- 在 SSM 架构中,通常将 POJO 用作数据传输对象(DTO)或持久化对象(PO)
- 与 POJO 相对应的是领域对象(domain object),也称为实体对象(entity),它代表应用程序的业务实体,通常包含业务逻辑和状态信息
此时 SSM 项目在所有用到 domain 对象的地方都报错,如:
public boolean save(Book book), 需要在 SSM Module 的 pom 文件中引入 Pojo Module在 SSM pom 文件中引入 Pojo 作为依赖
<!--SSM pom 依赖-->
<dependency>
    <groupId>com.jerry</groupId>
    <artifactId>pojo_module</artifactId>
    <version>1.0-SNAPSHOT</version>
</dependency>
依赖管理
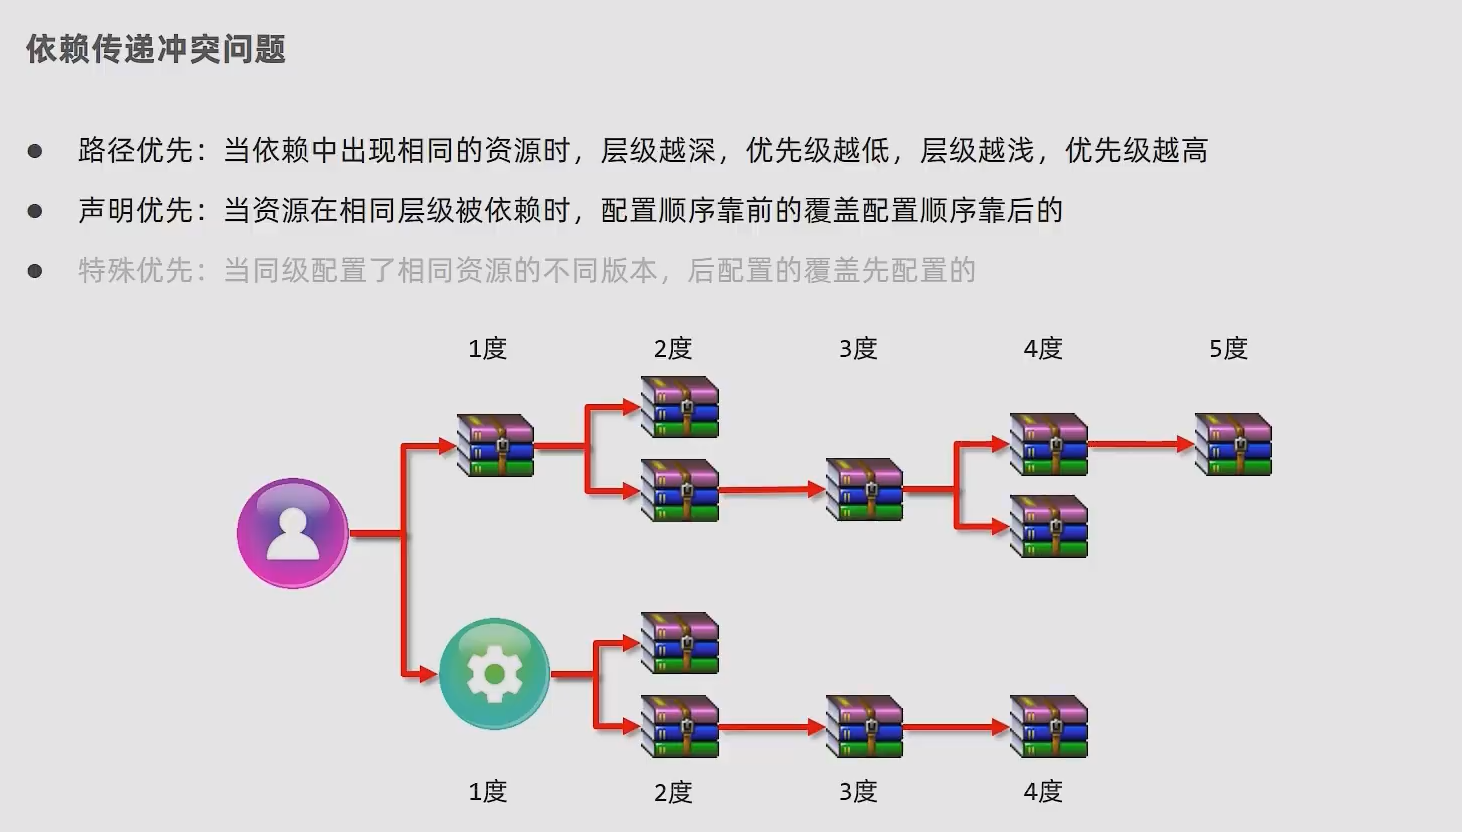
依赖传递
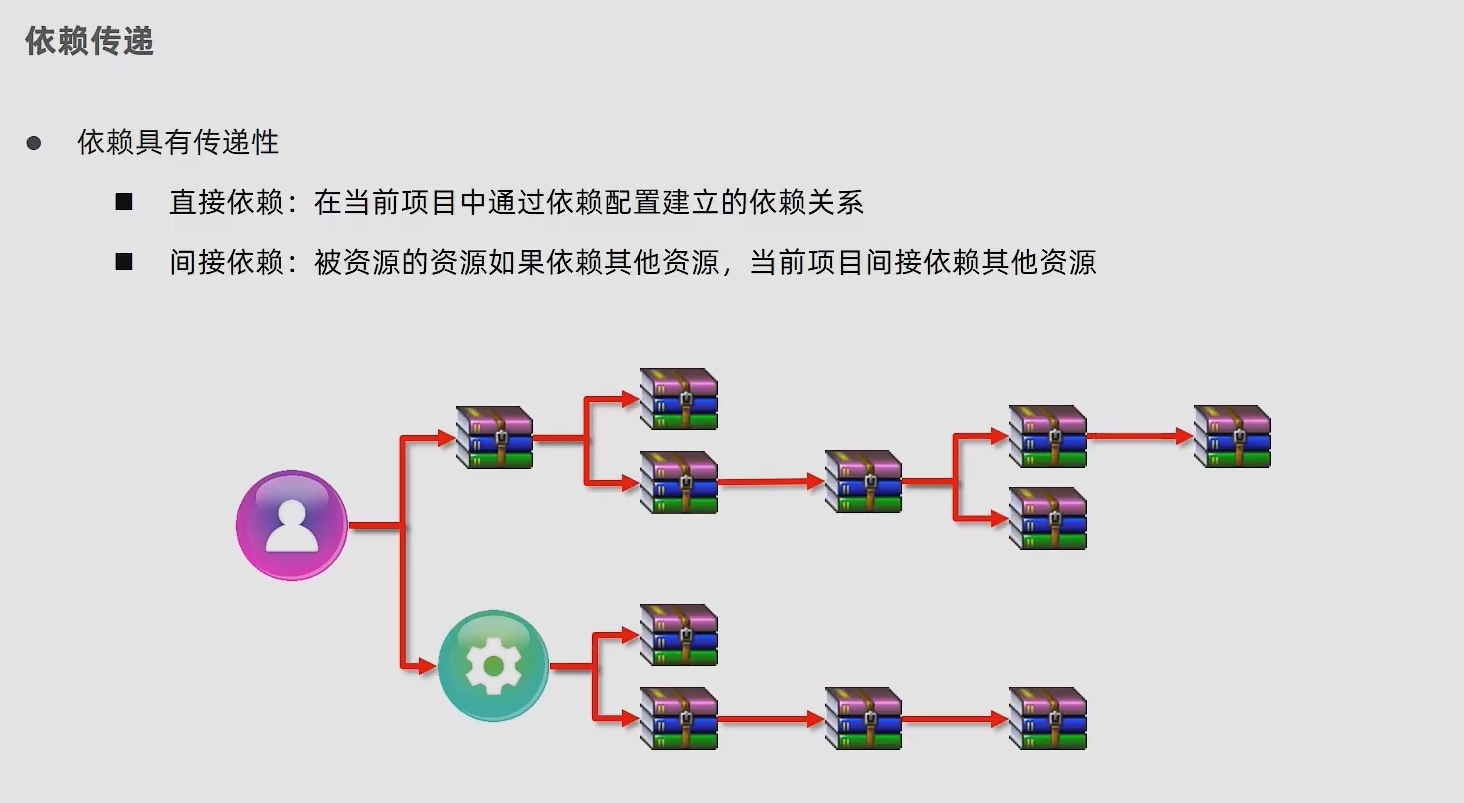
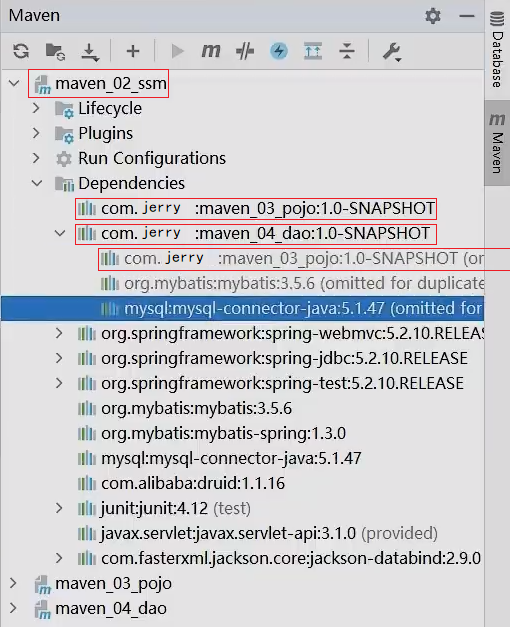
- 目前项目中,在 SSM,Pojo 和 Dao 三个Module POM 文件中,SSM 依赖了 Pojo 和 Dao
- 而 Dao 本身也依赖了 Pojo
- 根据依赖传递,SSM POM 文件中可以不写 Pojo 依赖
可选依赖
- 可选依赖指对外隐藏当前所依赖的资源 - 不透明
<dependency>
    <groupId>com.jerry</groupId>
    <artifactId>pojo_module</artifactId>
    <version>1.0-SNAPSHOT</version>
    <!--可选依赖是隐藏当前工程所依赖的资源,隐藏后对应资源将不具有依赖传递-->
    <optional>true</optional>
</dependency>
排除依赖
- 排除依赖指主动断开依赖的资源,被排除的资源无需指定版本 - 不需要
<dependency>
    <groupId>com.jerry</groupId>
    <artifactId>dao_module</artifactId>
    <version>1.0-SNAPSHOT</version>
    <!--排除依赖是隐藏当前资源对应的依赖关系-->
    <exclusions>
        <exclusion>
            <groupId>log4j</groupId>
            <artifactId>log4j</artifactId>
        </exclusion>
    </exclusions>
</dependency>
聚合与继承
聚合
原始 Module 之间关系,各维护各的,当 Pojo Module 更新时,其他 Module 并没有感知

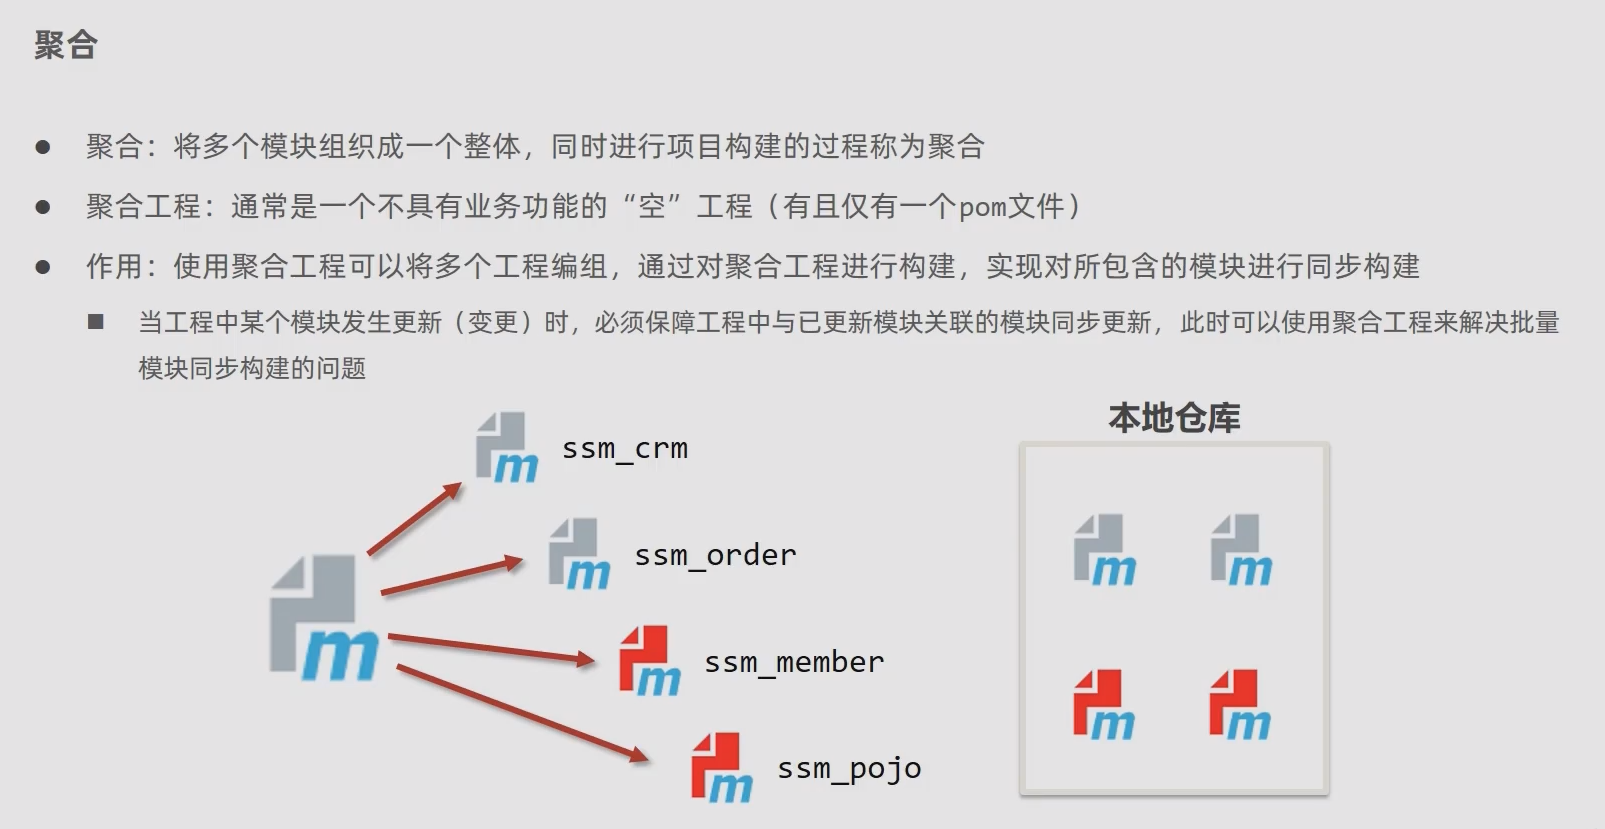
聚合后的 Module 结构:
- maven_01_parent(root)
- maven_02_ssm
- maven_03_pojo
- maven_04_dao
聚合工程的开发步骤
- 步骤1 创建 Maven 模块,设置打包类型为 pom,(maven 工程打包方式默认为 jar, web 工程打包方式为 war)
- 步骤2 设置当前聚合工程所包含的子模块名称
<groupId>com.jerry</groupId>
<artifactId>maven_01_parent</artifactId>
<version>1.0-SNAPSHOT</version>
<!--最大的区别的是打包方式,pom 表示这是一个聚合工程-->
<packaging>pom</packaging>
<!--设置管理的模块名称-->
<modules>
<!--不管写什么顺序,complie 时会按照依赖顺序的 complie-->
<module>../maven_02_ssm</module>
<module>../maven_03_pojo</module>
<module>../maven_04_dao</module>
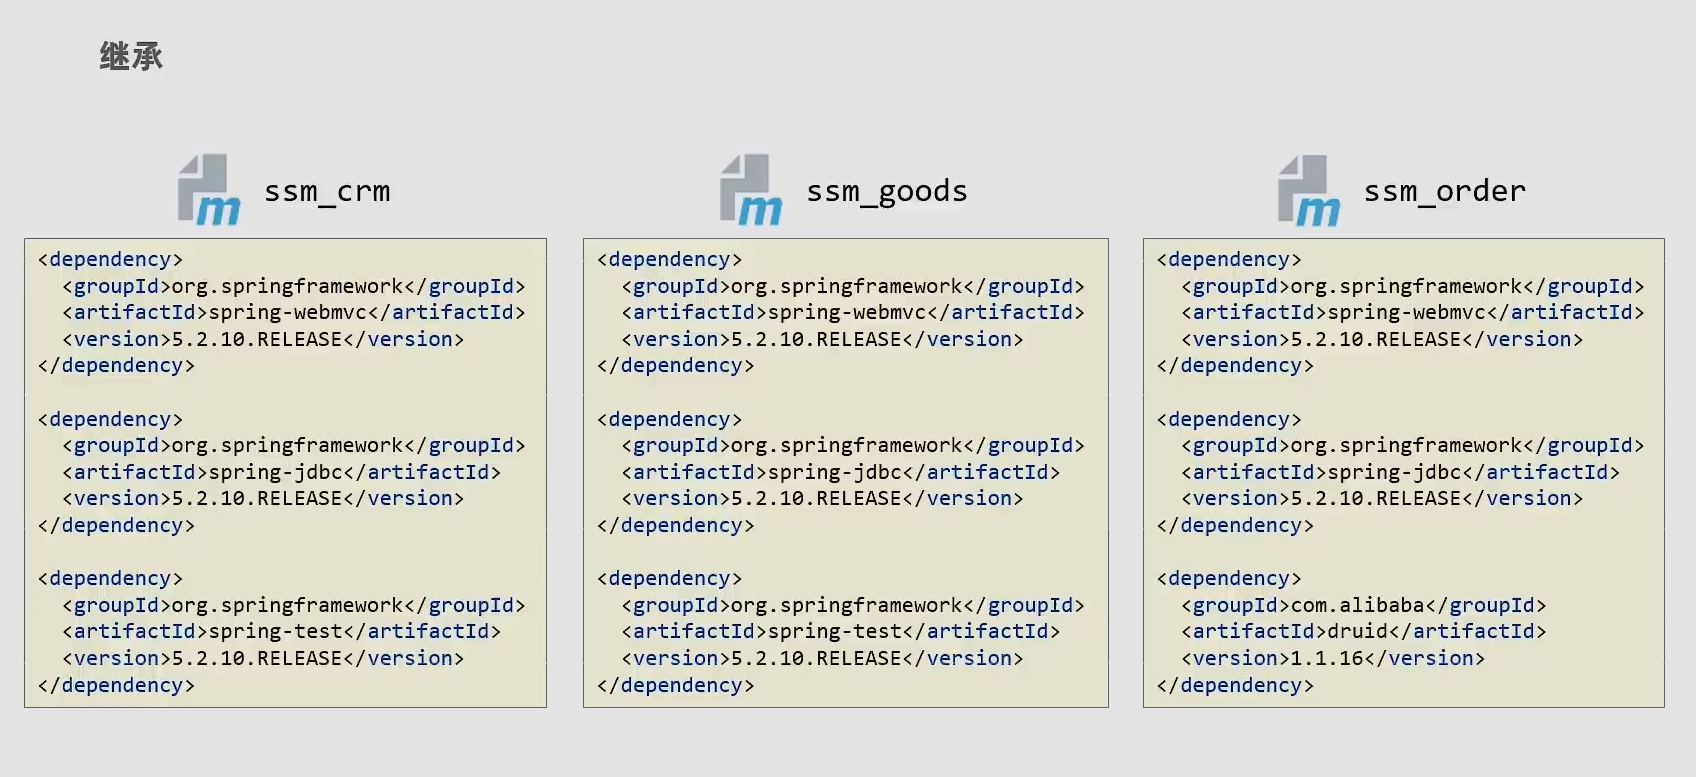
</modules>继承
- 问题1 模块依赖重复能不能简化
- 问题2 如何快速升级所有模块依赖版本
继承工程的开发步骤
步骤1 创建 Maven 模块,设置打包类型为 pom,(maven 工程打包方式默认为 jar, web 工程打包方式为 war)
<packaging>pom</packaging>步骤2 在父工程的 pom 文件中配置依赖关系(子工程将沿用父工程中的依赖关系)
<dependencies>
    <dependency>
        <groupId>org.springframework</groupId>
        <artifactId>spring-webmvc</artifactId>
        <version>5.2.10.RELEASE</version>
    </dependency>
    ...
</dependencies>
步骤3 在父工程的 pom 文件中配置子工程中可选的依赖
<dependencyManagement>
    <dependencies>
        <dependency>
            <groupId>com.alibaba</groupId>
            <arrifactId>druid</arrifactId>
            <version>1.1.16</version>
        </dependency>
        ...
    </dependencies>
</dependencyManagement>
步骤4 在子工程中配置当前工程所继承的父工程
<parent>
    <groupId>com.jerry</groupId>
	<artifactId>maven_01_parent</artifactId>
	<version>1.0-SNAPSHOT</version>
    <relativePath>../maven_parent/pom.xml</relativePath>
</parent>
步骤5 在子工程中配置使用父工程中的可选依赖的坐标,(只配群组 id 和项目 id,无需提供版本,版本由父工程统一提供)
<dependencies>
    <dependency>
        <groupId>com.alibaba</groupId>
        <arrifactId>druid</arrifactId>
    </dependency>
</dependencies>
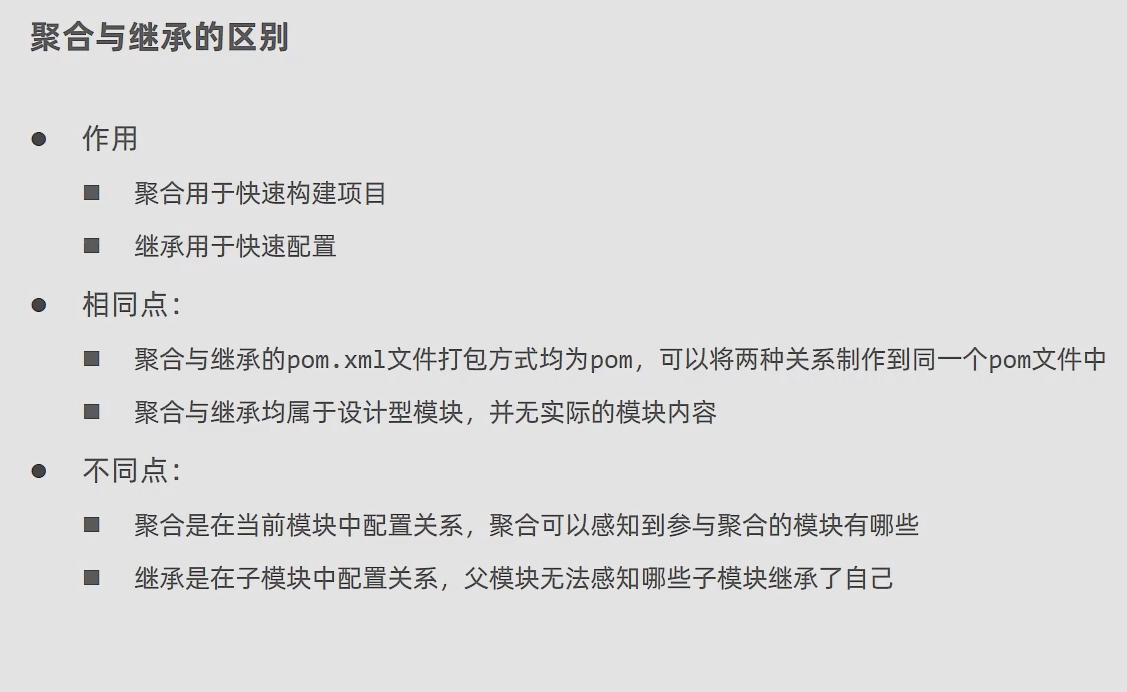
聚合和继承的区别
属性管理
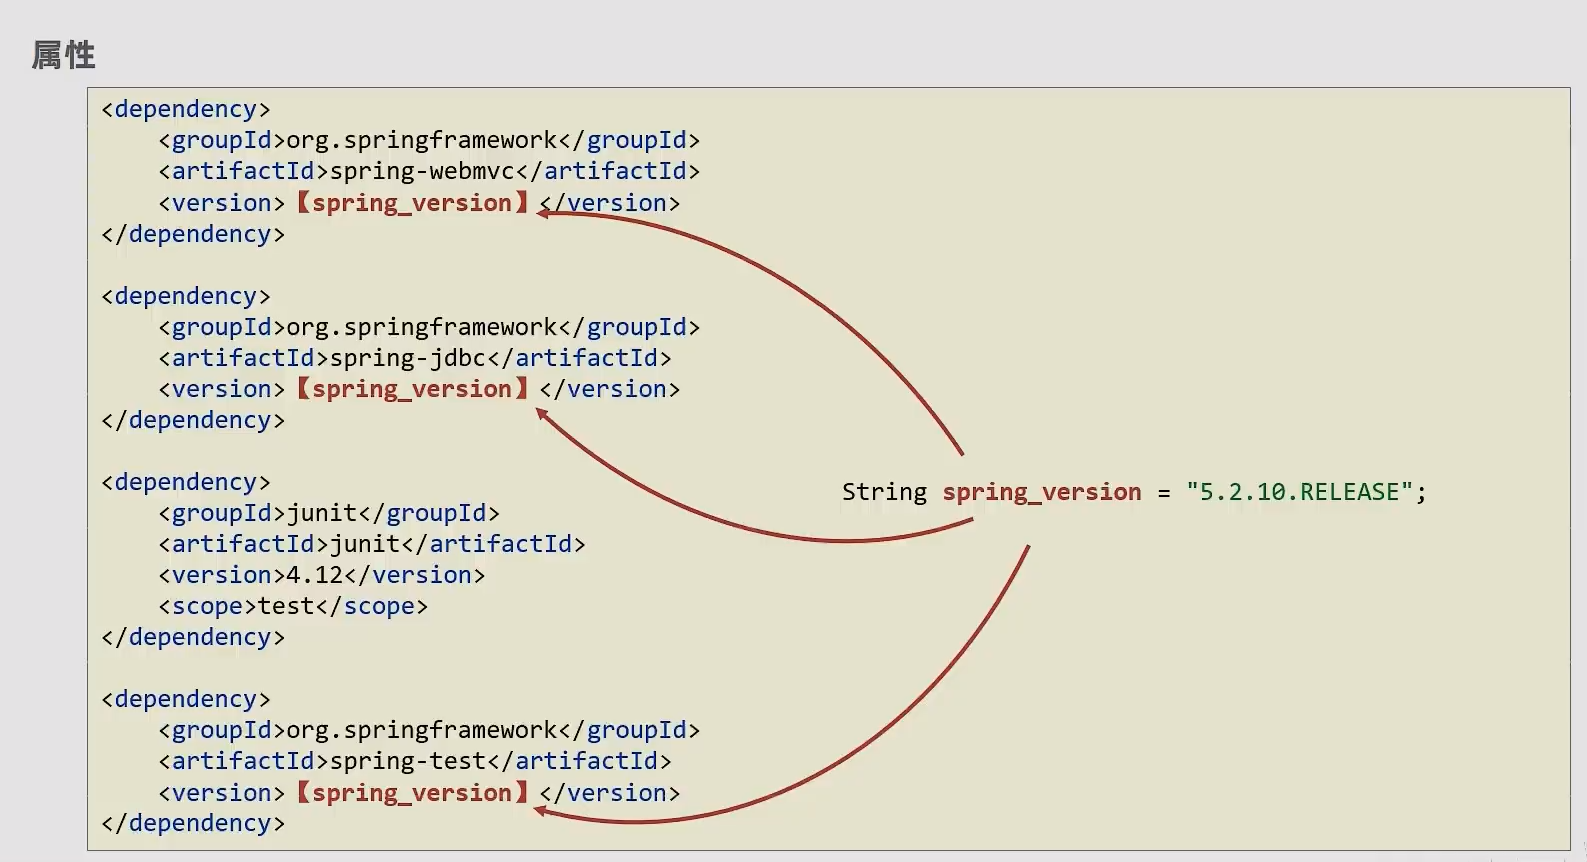
资源文件引用属性
步骤一:定义属性
<properties>
    <spring.version>5.2.10.RELEASE</spring.version>
    <junit.version>4.12</junit.version>
    <jdbc.url>jdbc:mysql://127.0.0.1:3306/ssm_db</jdbc.url>
</properties>
步骤二:配置文件中引用属性
jdbc.driver=com.mysql.jdbc.Driver
jdbc.url=${jdbc.url}
jdbc.username=root
jdbc.password=root
步骤三:(最重要) 开启资源文件目录加载属性的过滤器
<build>
    <resources>
        <resource>
            <directory>${project.basedir}/src/main/resources</directory>
        	<filtering>true</filtering>
        </resource>
    </resources>
</build>
步骤四:(了解) 配置 maven 打 war 包时,忽略 web.xml 检查
<plugin>
    <groupId>org.apache.maven.plugins</groupId>
    <artifactId>maven-war-plugin</artifactId>
    <version>3.2.3</version>
    <configration>
        <failOnMissingWebXml>false</failOnMissingWebXml>
    </configration>
</plugin>
其他属性
| 属性分类 | 引用格式 | 示例 |
|---|---|---|
| 自定义属性 | ${自定义属性名} | ${spring.version} |
| 内置属性 | ${内置属性名} | ${basedir} ${version} |
| Setting 属性 | ${setting.属性名} | ${settings.localRepository} |
| Java 系统属性 | ${系统属性分类.系统属性名} | ${user.home} |
| 环境变量属性 | ${evn.环境变量属性名} | ${env.JAVA_HOME} |
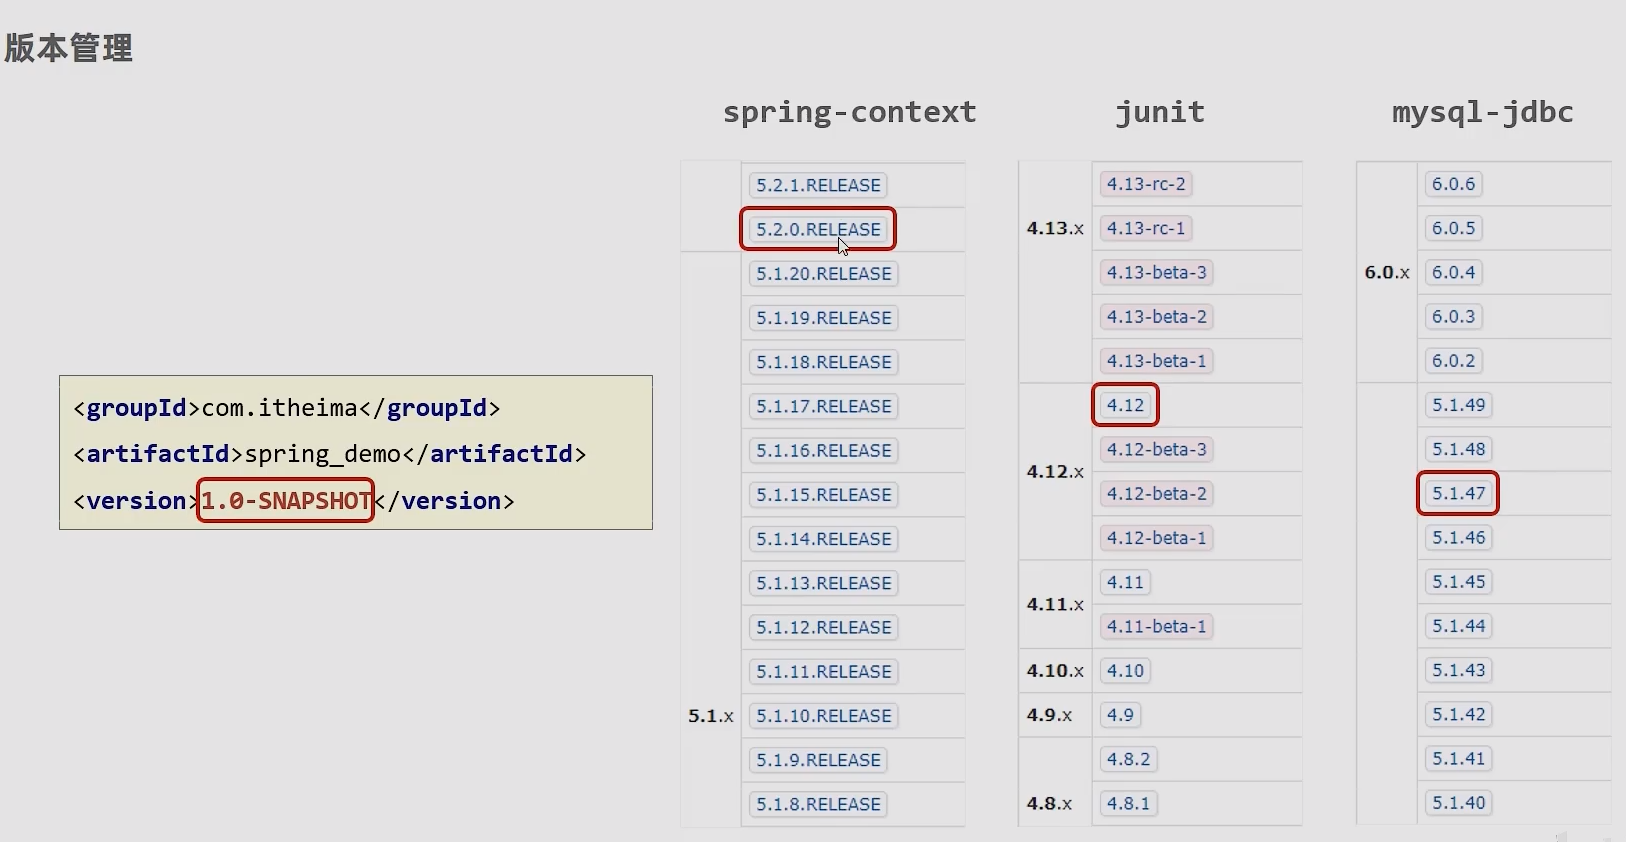
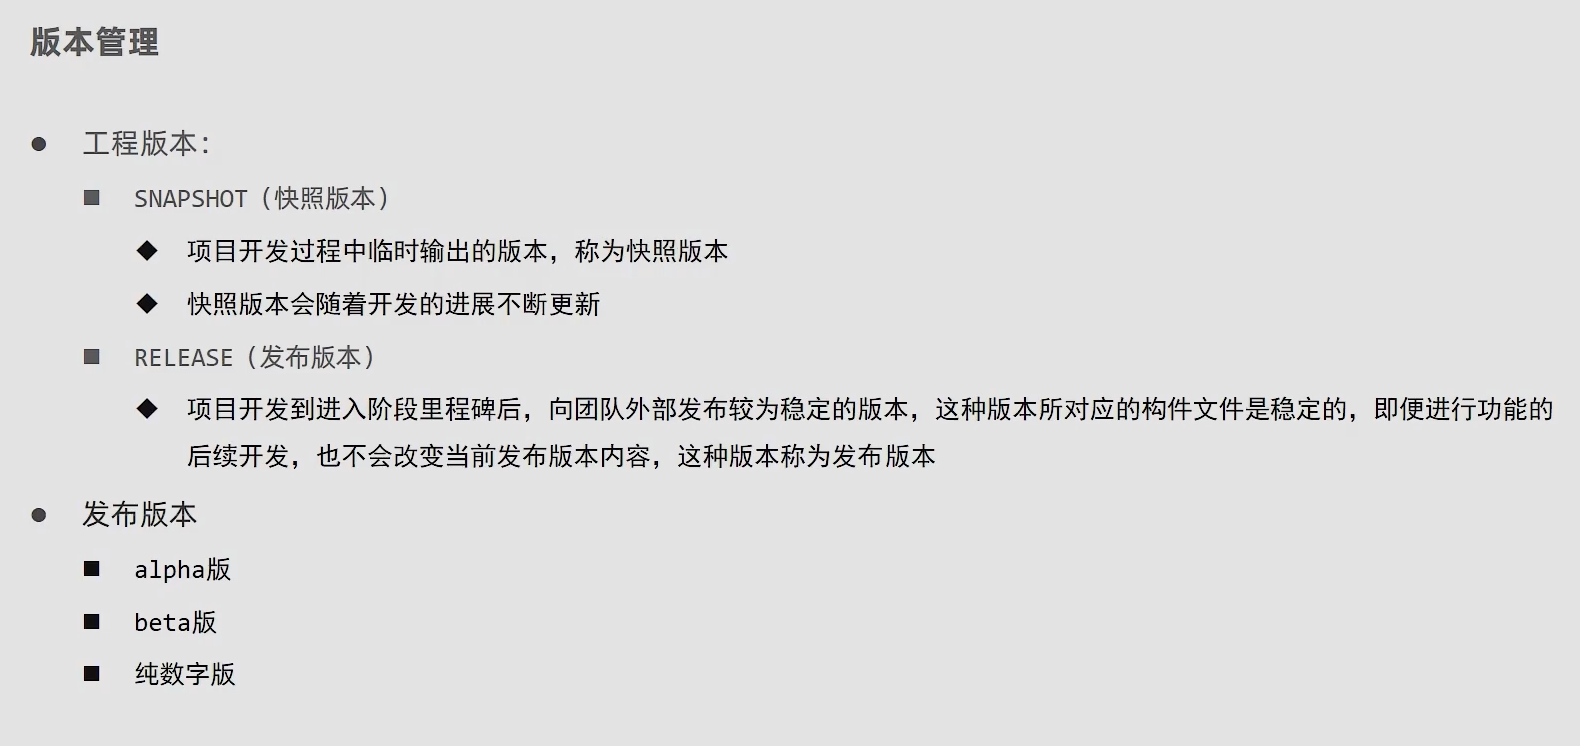
版本管理
多环境配置与应用
多环境开发
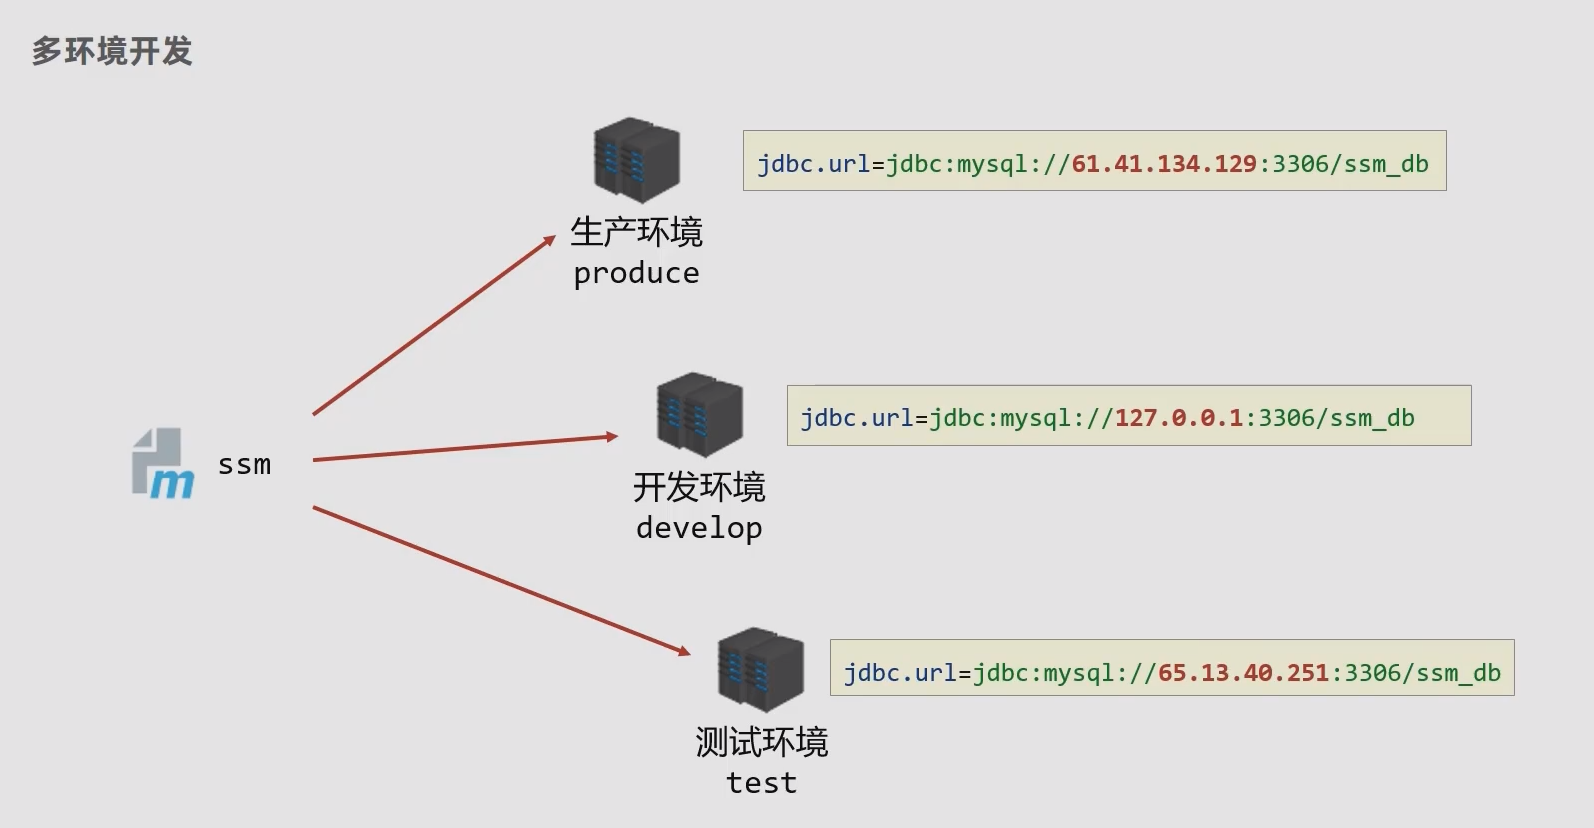
步骤一:定义多环境
<!--配置多环境-->
<profiles>
    <profile>
        <id>env_dep</id>
        <properties>
            <jdbc.url>jdbc:mysql://127.1.1.1:3306/ssm_db</jdbc.url>
        </properties>
        <!--设定默认启动环境-->
        <activation>
            <activeByDefault>true</activeByDefault>
        </activation>
    </profile>

    <profile>
        <id>env_pro</id>
        <properties>
            <jdbc.url>jdbc:mysql://127.2.2.2:3306/ssm_db</jdbc.url>
        </properties>
    </profile>

    <profile>
        <id>env_test</id>
        <properties>
            <jdbc.url>jdbc:mysql://127.3.3.3:3306/ssm_db</jdbc.url>
        </properties>
    </profile>
</profiles>
步骤二:构建过程
mvn 指令 -P 定义环境id范例:
mvn install -P pro_env
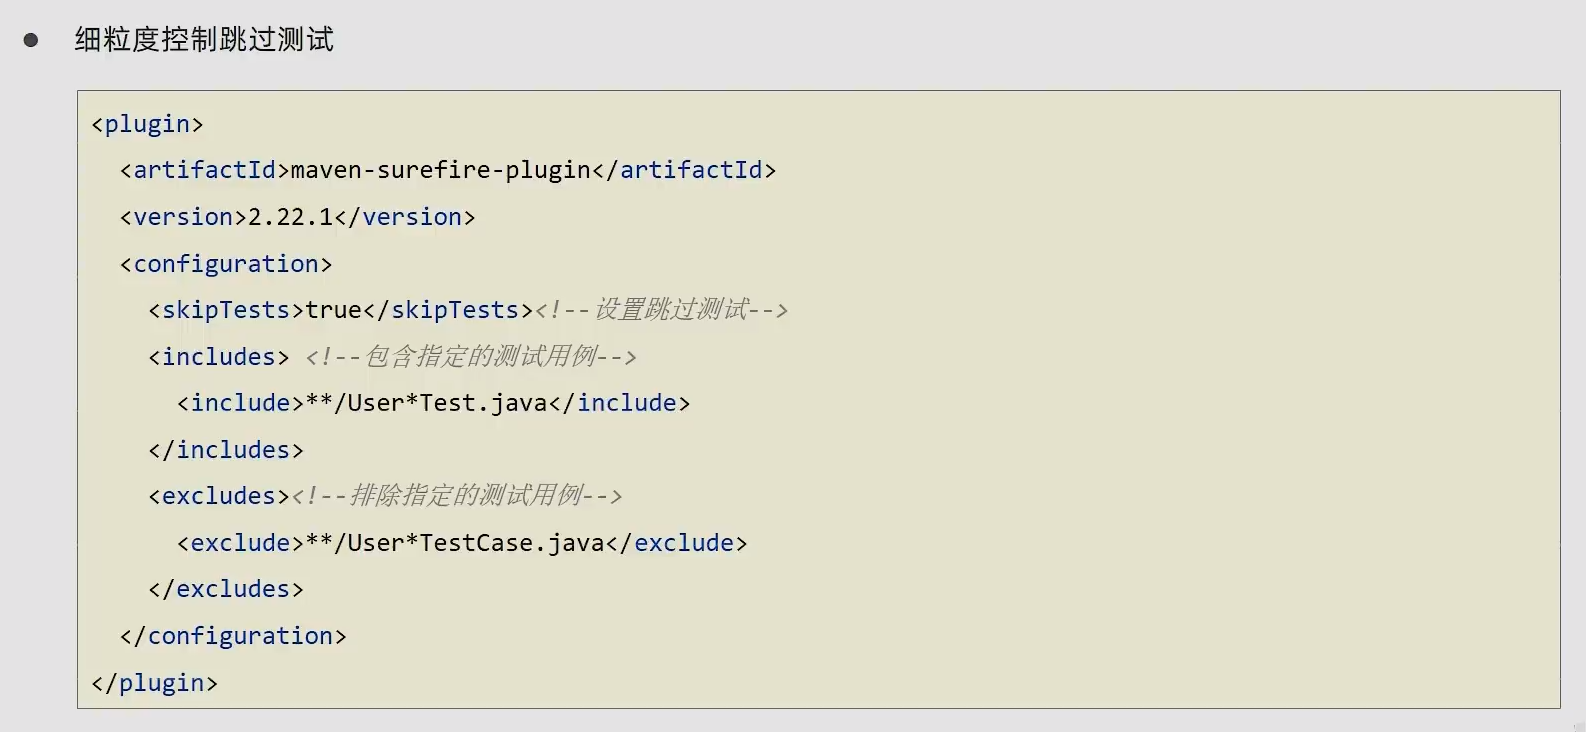
跳过测试
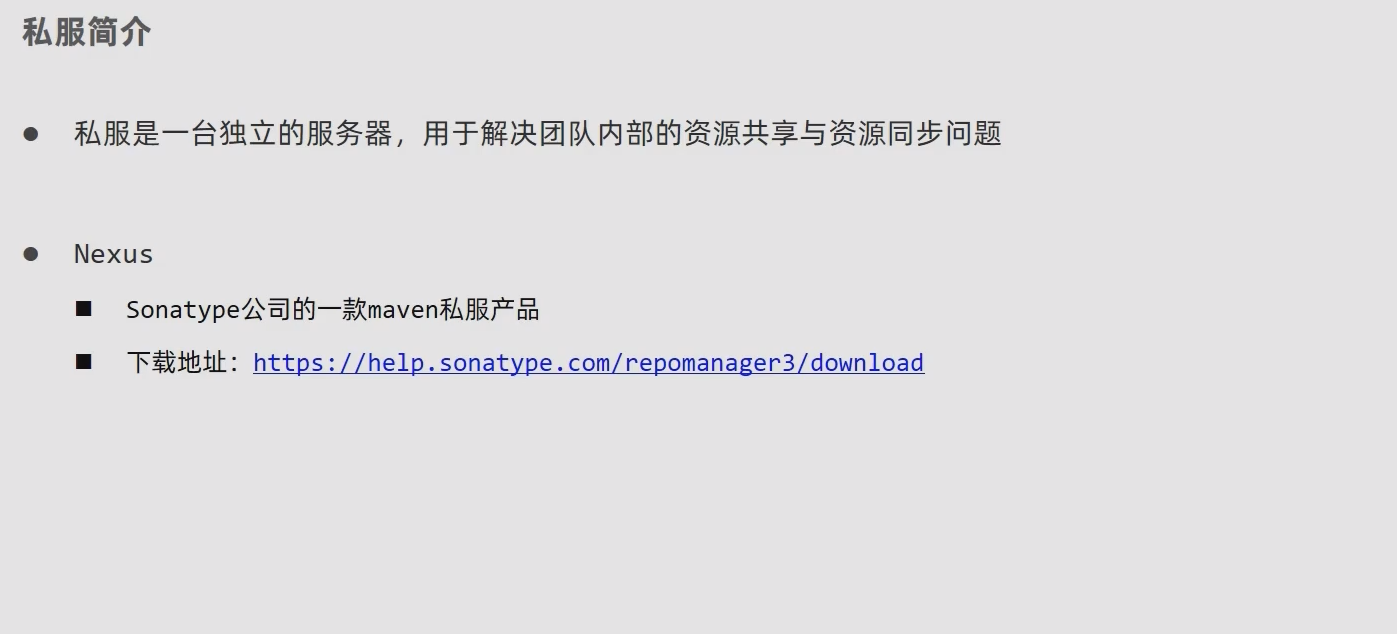
私服
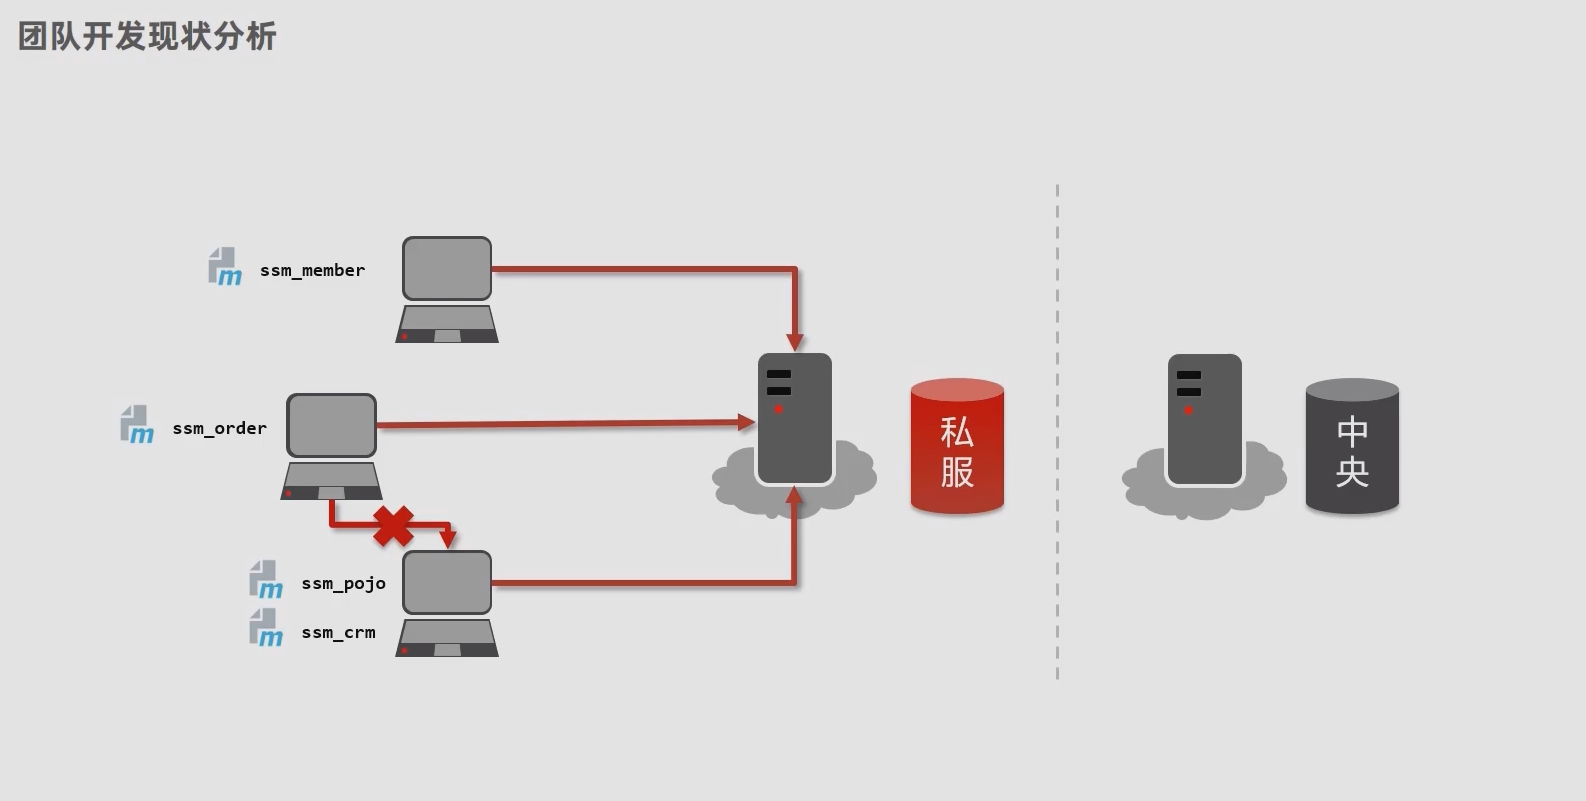
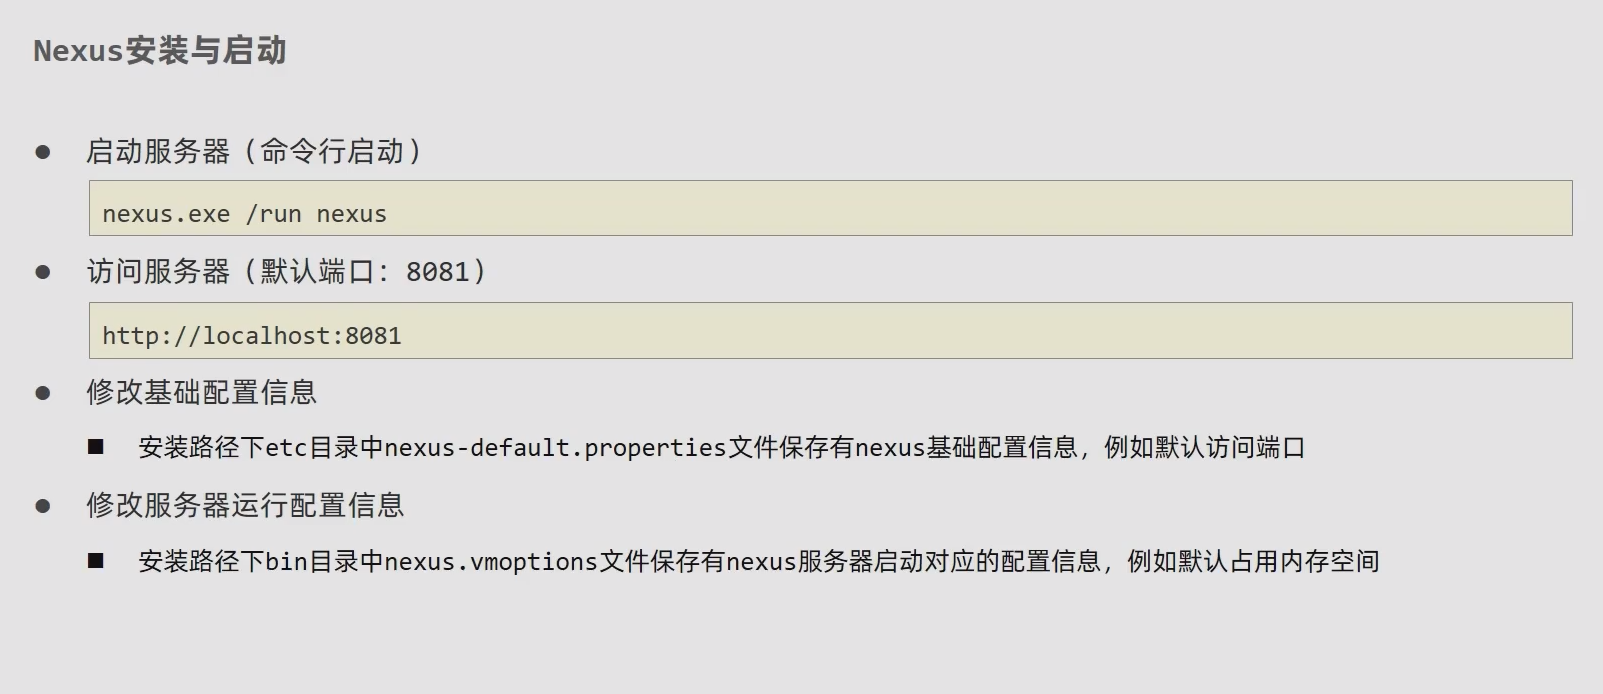
私服仓库分类
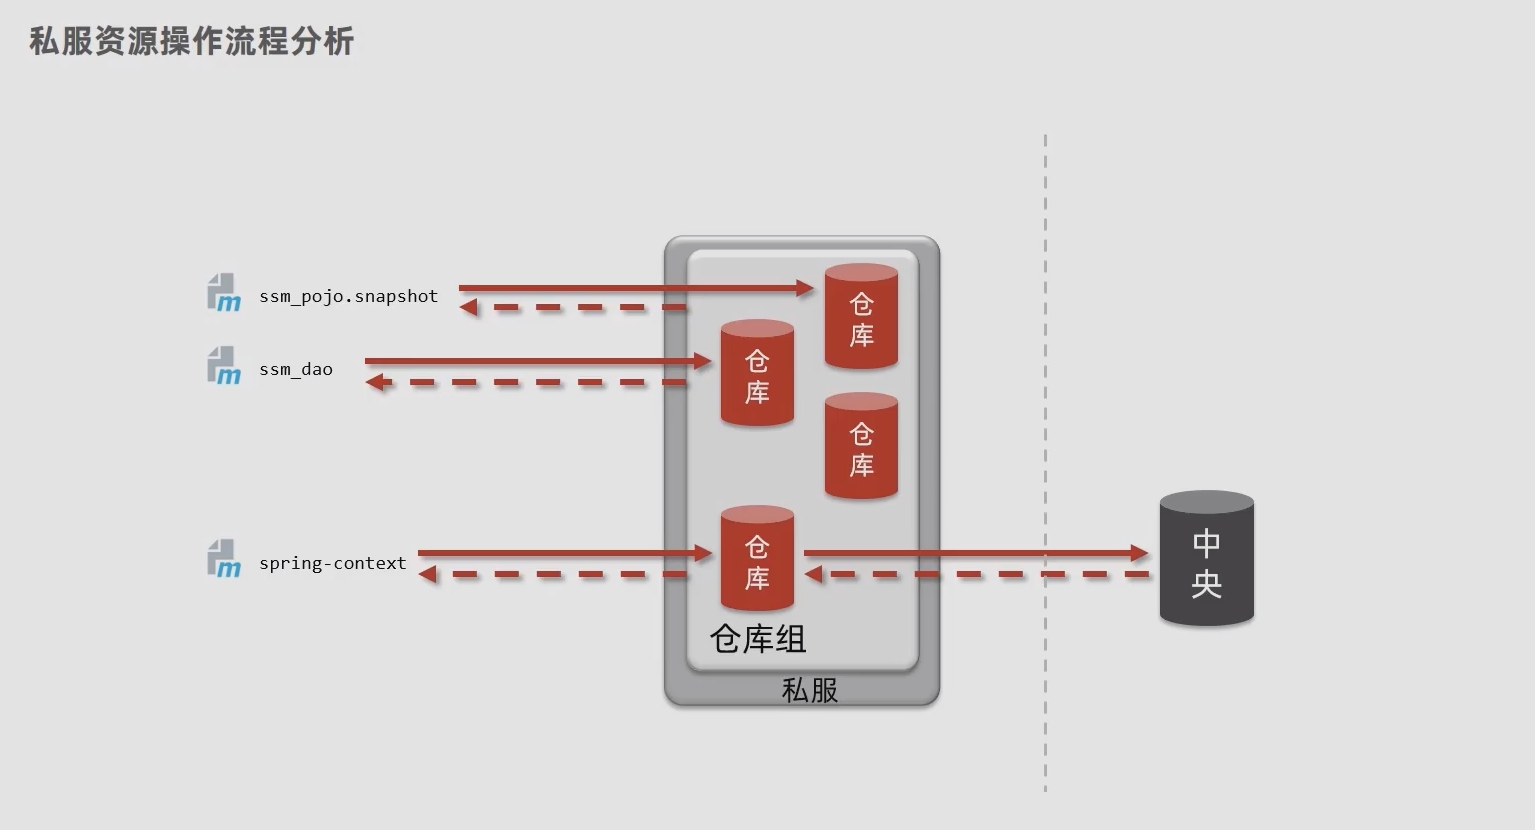
| 仓库类别 | Name | 功能 | 关联操作 |
|---|---|---|---|
| 宿主仓库 | hosted | 保存自主研发 + 第三方资源 | 上传 |
| 代理仓库 | proxy | 代理连接中央仓库 | 下载 |
| 仓库组 | group | 为仓库编组简化下载操作 | 下载 |
本地仓库访问私服配置
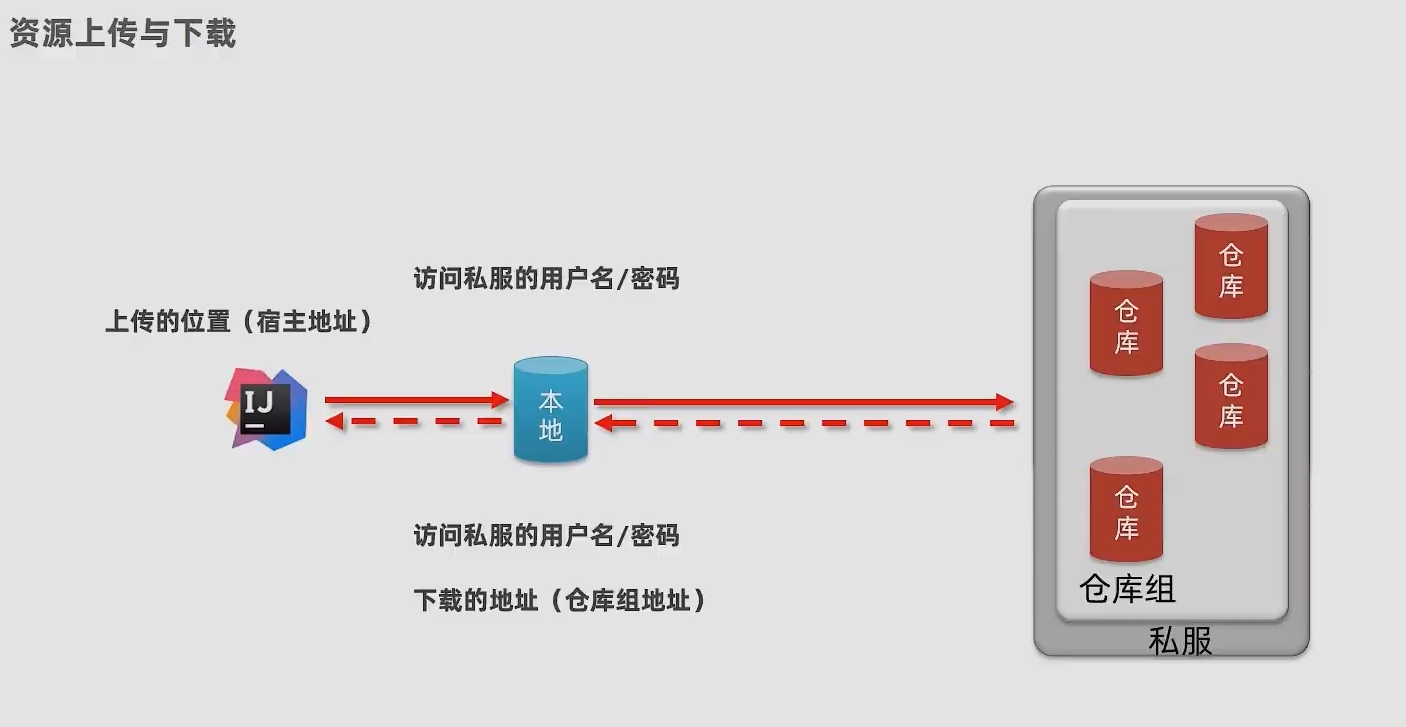
步骤一:配置位置(Maven setting.xml 文件中)
<servers>
    <server>
        <id>jerry-release</id>
        <username>admin</username>
        <password>admin</password>
    </server>
    <server>
        <id>jerry-snapshots</id>
        <username>admin</username>
        <password>admin</password>
    </server>
</servers>
步骤二:配置私服地址(Maven setting.xml 文件中)
<mirrors>
    <mirror>
        <id>nexus-jerry</id>
        <mirrorOf>*</mirrorOf>
        <url>http://localhost:8081/repository/maven-public</url>
    </mirror>
</mirrors>
步骤三:配置发布管理(工程 pom 文件中)
<distributionManagement>
    <repository>
        <id>jerry-release</id>
        <url>http://localhost:8081/repository/maven-release</url>
    </repository>
    <snapshotRepository>
        <id>jerry-snapshots</id>
        <url>http://localhost:8081/repository/maven-snapshots</url>
    </snapshotRepository>
</distributionManagement>
发布命令
mvn deploy